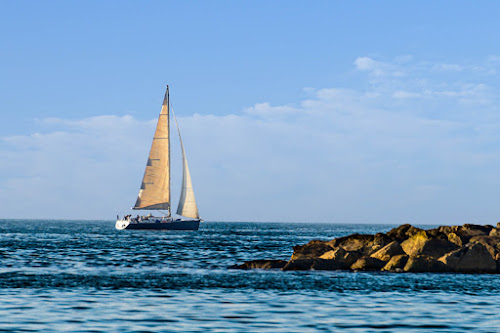
It's been a while since I posted to this blog, by "a while" I mean more than a year. Lots of reasons, but I'll skip those and get right to the subject of this post: Making Water Wet (in Lightroom).
Why in the world would I need to make water wet, it is that way naturally, isn't it? Looking at raw images, apparently not always. Water in a RAW image can look flat and dull. For that matter sometimes pavement or rocks would look better with a bit of a moist glisten.
I just picked up a technique courtesy of Scott Kelby in one of his videos that literally can make water (or stones, or pavement) look wet.
(tl/dr summary) -- Use local adjustment brush and set contrast and clarity to 100 (yes, pin to the max) and brush on the adjustment.
Now for an Example
Other than its location (Tel Aviv is a once in a lifetime for me) and subject (my honey likes sailboats) this image has no reason not to hit the bit bucket.
Making the Water Wet
The image still looks underwhelming. That sky is nearly a monotone of cloud. It doesn't look like I remember seeing. So, I'll take a swing at that.
Addressing the Boring Sky
 |
- Duplicate Layer... from the "good sky" image into the sailboat image,
- Create a layer mask to reveal the boat, water, rocks, and that annoying pole
- Move the masked "boat" layer above the "sky" layer in the layer stack,
- Use Free Transform (⌘T) to move and resize the "sky" layer so that the clouds look good and other elements are hidden,
- Save the image and return to Lightroom.
Cropping the Image
- The Boat (Yea! That is what I wanted),
- The annoying vertical pole on the skyline (boo),
- The out of focus foreground wave (yuck).
Digression: Lightroom offers a variety of overlay guides in the crop tool, some of them are: Diagonal, Triangular, The Golden Mean, The Golden Spiral. You can toggle between them with the "O" key while inside the crop tool.
Final Adjustments
- Basic:Dehaze +8 (crisps the clouds just a tad),
- Basic:Vibrance +8 ( a bit more color),
- HSL:Saturation:Orange +20 (warm up the sail and rocks a bit),
- HSL:Saturation:Yellow +10 (same as orange),
- Effects:Highlight Priority:Amount: -11 (a very subtle Vignette),
- Radial Filter:Exposure -0.2 covering the sail boat (darkens everything but the subject a tiny bit).


No comments:
Post a Comment